Steps of watercolor horse head
Watercolor horse head painting.
This is short painting journal of the watercolor painting that I did of my horse Ted. E. Bear.
He is a sweet guy and I have been wanting to paint him for a long time, so here he is.
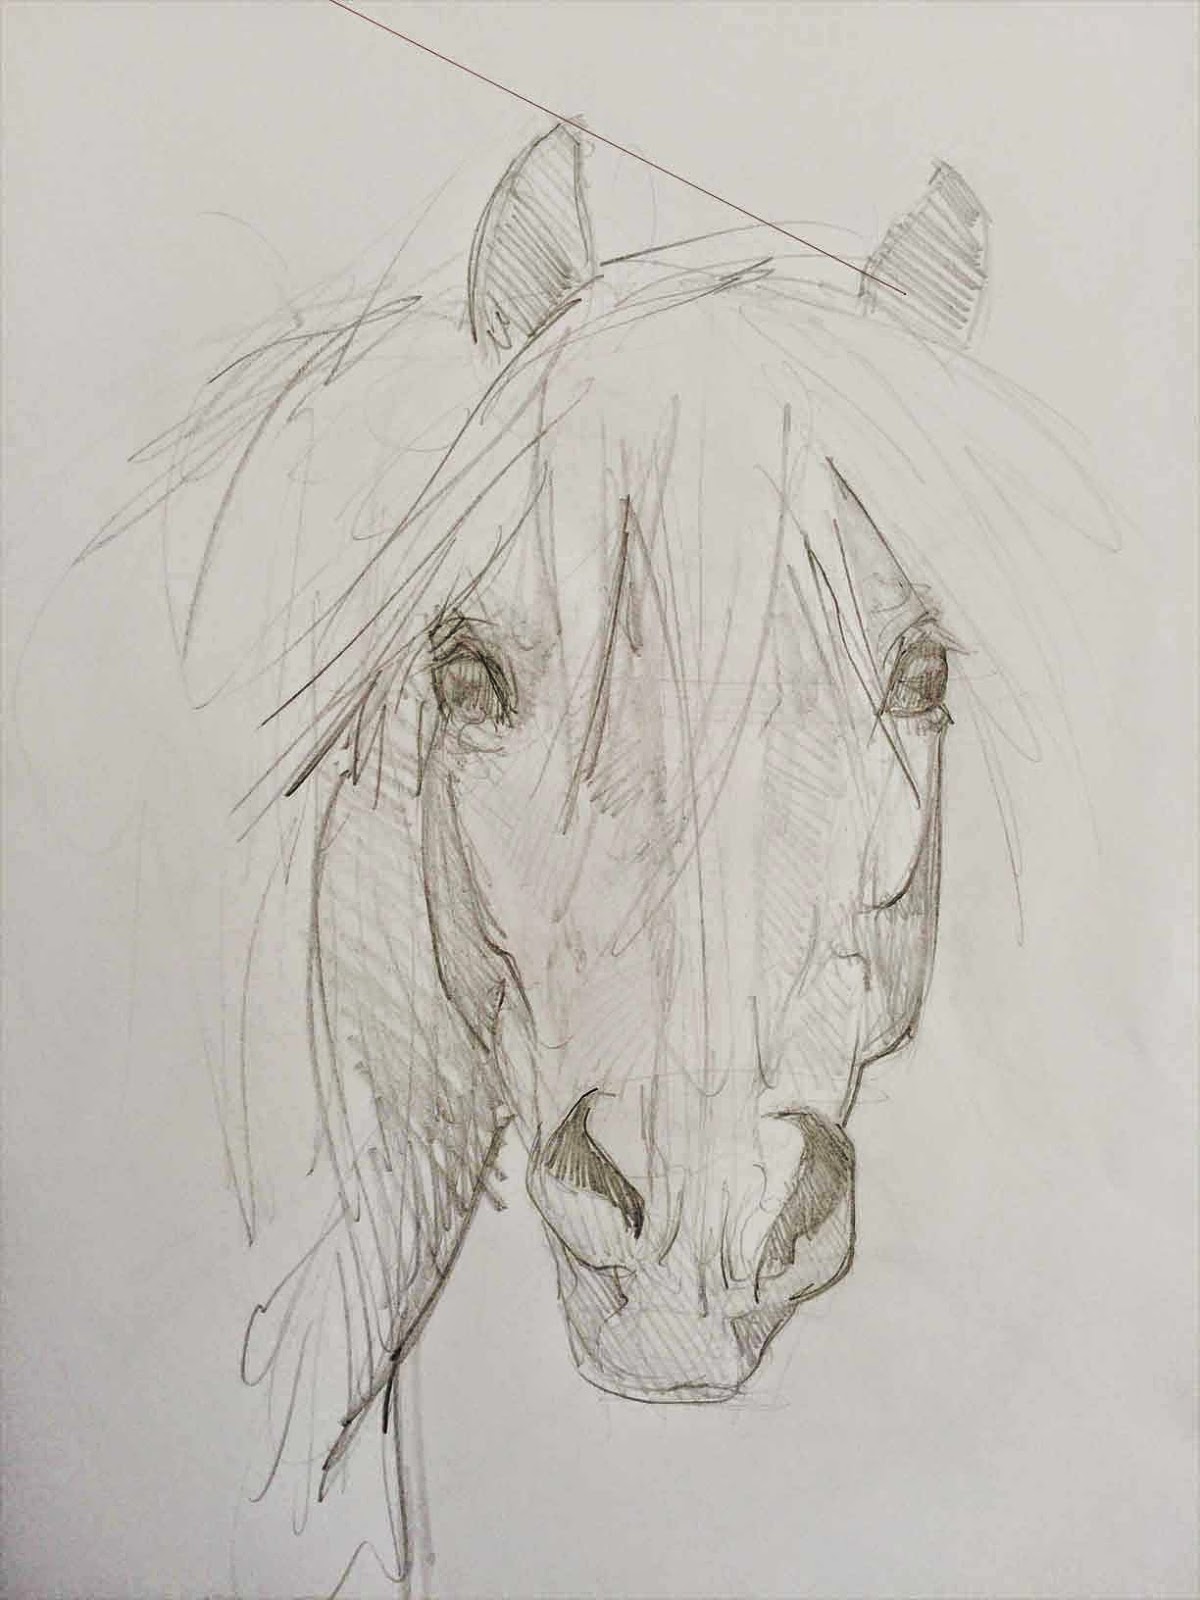
START with a few drawings of the subject you intend to paint. I use my prelim drawings as a way to study
the painting before I even start it. It is never a waste of time to take the time to study the subject through drawing. Figuring out the shapes and the layout of the darks and lights with a drawing will make your painting go much easier. Basic good drawing skill will always help your painting life go much more smoothly.

....then using a kneaded eraser lighten up the drawing until it is almost invisible, I try to aim for as few pencil
lines as possible. Wet the paper and lay in light washes of color. After this first wash dries completely, you can go back in and erase as much of the pencil as you can.


soft blending of the colors to occur, moisten the surface of the area to be painted and lay in your color layers.
Much of when, to wait and when to go back in with color while the surface is still wet, will be in just doing
many paintings, your timing will get better and more accurate, the more that you paint.

size, sometimes when I am working so intently on a painting I cannot see the forest for the trees.
If this is you too, every once in a while walk away from the work and look at it from afar-across the room.
Its easy to get blinded by your work and the "mistakes" do not readily jump out at you.
Trying to follow my own advice, I notice that the ear "stage left" is way off of drawing.....
 .
.When I consult the photo and analyze my work...wow, really off...
If at any time the colors become too deep and you need to lighten them, you can lift them off gently
by blotting with a paper towel or old dish rag.

the area you want to "lift"...dab with a rag or towel...the error I made was pretty large but I did manage
to move his ear back into its proper place(If I had started with a correct drawing in the first place, that would of
not been an issue ! ). Let the area dry completely, before you attempt repainting the ear shape. The entire process
of painting is painting and constructively be able to crit And change the work as you go along.

Here is the finished Ted. E. Bear. Its always a challenge to portray a member of your own family! I wish you great success in your painting journey. Stay positive and look for the small changes you can make to improve and keep drawing! Happy Painting!
All Artwork Copyright by Susan Iwakoshi

Comments
Post a Comment